Media Setup - Test Path, Media Thickness and Printhead Height
Touchscreen Menu Choices and Features
When you touch the “Menu Button” [B] a drop-down list of Menu choices appear with the following selections: Job, Setup, Test Print, Maintenance, Wiper and System Test. Touch one of these Menu selections to display the corresponding Menu Feature Buttons [G].
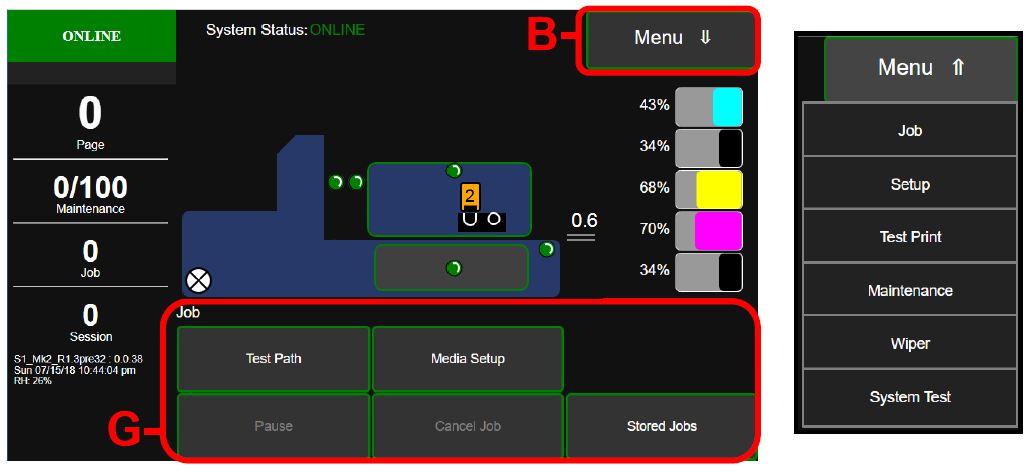
Job Menu
Job Menu Buttons provide quick access to common functions needed when printing a Job; such as:
Test Path, Media Setup, Pause, Cancel Job, Stored Jobs
Test Path: Tap to run media through the Printer, without printing, to check the media feed set-up. CAUTION! Before using this feature you need to make sure the printer has been properly setup to separate and feed the media you are using. After pressing “Test Path” button the printer transport will start and media, if present, will be fed from the feeder section into the print area and though the system. A “Stop Path” button will be displayed at this time. Tap “Stop Path” to stop feeding and transport process. |  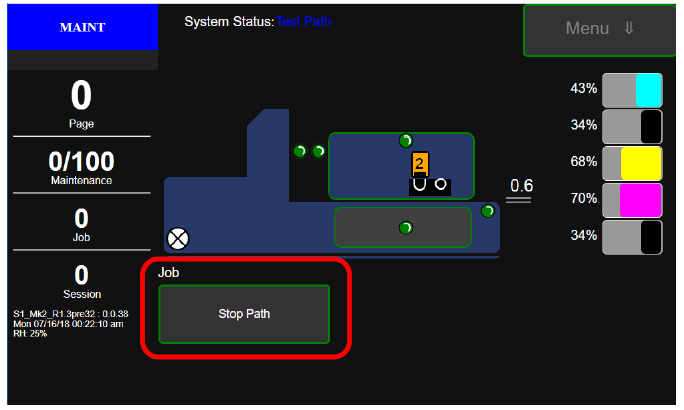 |
If a paper feed error occurs a “Clear Error” button will appear. Remove media from the paper path and tap Clear Error button. Tip: You can use the “Run Path” feature (Menu, Setup and Run Path) to clear media from the printer; while in an error state. Do not use this feature if there is a physical jam. Physical jams must be removed manually. See “Removing Jammed Media” for instructions. |  |
Media Setup – Tap to open the “Media Setup” Menu. In this menu you can set Media Thickness and Print Height. Select Ignore Exit Sensor, Select Fast Feeding and Feed Gap options. Media Thickness - Moves the Clamshell up/down (0.1mm to 10mm) to accommodate media thickness. See section titled “Adjust Media Thickness”, within the “Operating Printer” section, for aid in making an appropriate media thickness selection. To adjust and set the Media Thickness: 1. Tap the Media Setup button to open the Media Setup screen. 2. Under Media Thickness you will find the Current media thickess setting and the Dial used to adjust the media thickness. 3. To move the Dial, press and drag the Selector (small white circle) around the circular scale to obtain the desired (New) Media Thickness value. Selected value will be shown next to New. NOTE: After making any changes to items on this screen, the Apply button will turn RED and the Exit button will change to a Cancel button; giving you the ability to cancel any changes you have made and close the screen. 4. If New value is correct; tap the Apply button (currently RED) to confirm the change. The Clamshell will move up or down to the New thickness setting. During this time the Selector and New value will also turn RED. Once the Clamshell reaches the New thickness setting the Selector will turn WHITE again and the Apply button will turn GREEN again. In addition, the Current and New values will now match. 5. Tap the Exit button to exit the Media Setup screen. 6. You can test for proper setup using the “Test Path” button. Adjust as necessary. |  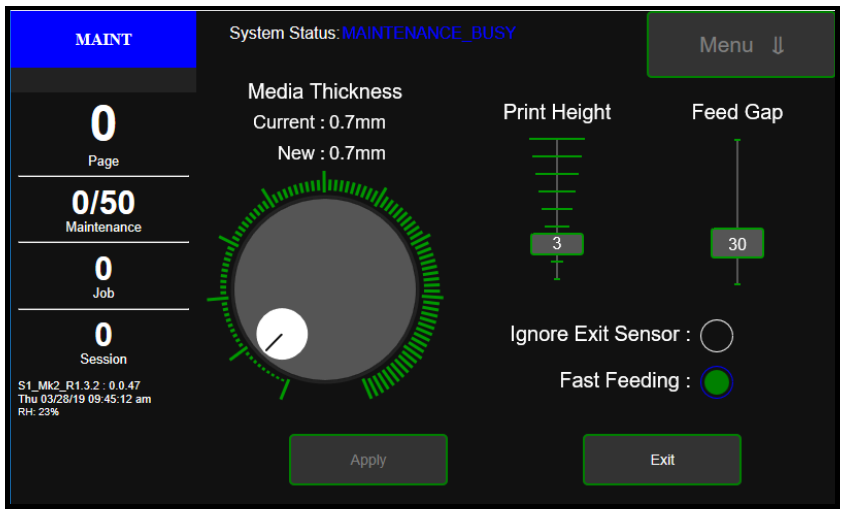  |
Print Height - Use to raise/lower the Printhead (in small increments) independently from the current Media Thickness setting. This feature can be useful for helping to avoid media to Printhead surface contact; which can cause “scuff marks” on the media. This feature may also be useful for improving Image Sharpness. Range: 1 (lowest) to 9 (highest) NOTE: When using this feature there is a trade-off between image sharpness and reducing head to media contact. You may need to experiment to find an acceptable selection for your particular job/media. To adjust and set the Print Height: 1. Press and drag the Selector (small green box) up or down the scale to the desired value. - Set the Print Height to a higher value to help reduce media to Printhead contact (scuff marks). - Set the Print Height to a lower value to help improve image sharpness. NOTE: After making any changes to items on this screen, the Apply button will turn RED and the Exit button will change to a Cancel button; giving you the ability to cancel any changes you have made and close the screen. 2. Tap the Apply button to save the new value. 3. Tap the Exit button to exit the Media Setup screen. The current Print Height value will also be displayed within the Printhead Icon; as shown here. Tip: Media to Printhead contact and image sharpness can also be affected by the Media Thickness setting. Before changing the Print Height value, please be sure the Media Thickness setting is correct. Please see “Media Thickness” found in the section titled “Job Menu” for details. | 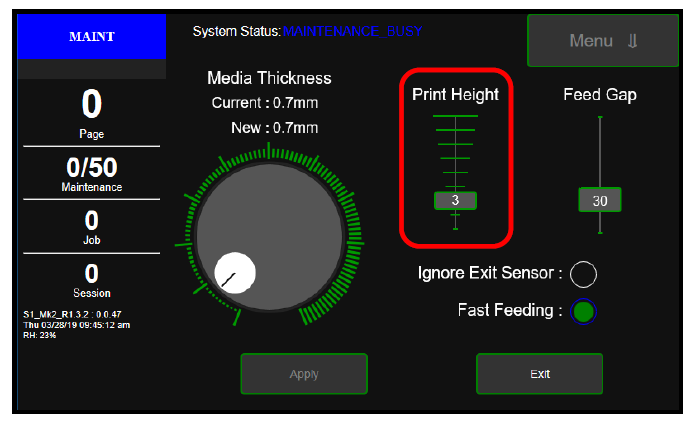 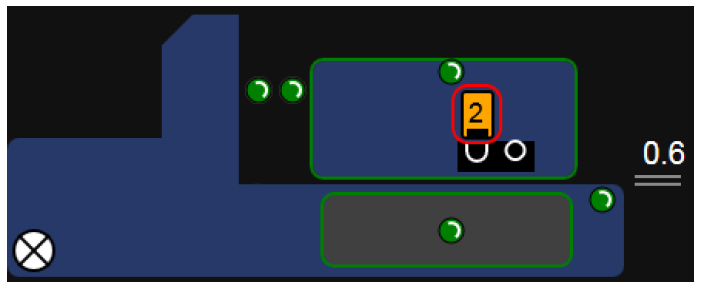 |
